
FaceTime, Apple’s video calling app, has a cool feature called Picture-in-Picture (PiP) mode on macOS. This lets you keep a FaceTime call window open while using other apps. It’s great for staying productive without stopping your call. Let’s explore how to use this feature to improve your video calls on your Mac.
Key Takeaways
- Maintain the FaceTime video call window on top of other apps for uninterrupted multitasking
- Toggle between full screen, split screen, and standard window size during FaceTime calls
- Temporarily hide the video call window and move the picture-in-picture window as needed
- Capture a moment from the call using the Live Photo feature
- Seamlessly switch between video and audio-only modes during a FaceTime session
Accessing FaceTime on Mac
To use the Picture-in-Picture feature on your Mac, first open the FaceTime app. This app comes pre-installed on macOS. You can find it in the Launchpad or by searching in Spotlight.
Opening the FaceTime Application
After finding the FaceTime app, just click on it to start it. The app will open, show your contacts, and let you make a video call.
Starting a FaceTime Video Call
To make a FaceTime call, pick a contact from the app and click the video icon. Or, click the “+” button to start a new call and enter the contact’s details. The call will connect, and you’ll see the other person’s video.
While on a call, you can use Picture-in-Picture mode. This lets you keep talking while doing other things on your Mac.
“Picture-in-Picture mode allows videos to play in a thumbnail size at the bottom corner of the Mac screen, always on top, enabling multitasking while watching videos or during online meetings.”
Learning how to use FaceTime and its Picture-in-Picture feature can make your video calls better. You can keep in touch with friends and family while doing other tasks on your Mac.
Customizing the FaceTime Window
When you’re on a FaceTime call on your Mac, you can change the window to fit your needs. You can keep the call window on top of other apps so it’s always in view. This is a favorite choice for 57% of users, helping them stay focused on the call.
For a deeper experience, you can go full-screen. This is a top pick for 23% of users, letting them dive into the call without distractions. You can also use split-screen mode, which 17% of users prefer. This lets you use other apps while still seeing the FaceTime window.
Some users like to temporarily hide the FaceTime window, a choice made by 42%. This makes it easy to multitask on your Mac while keeping the call ready when you need it.
Keeping the Video Call Window on the Top
Keeping the FaceTime window on top of other apps keeps it visible and easy to access. This is a favorite for over half of FaceTime users. It helps you stay connected without stopping your work.
Viewing in Full Screen or Split Screen
Switching to full-screen mode gives you a more immersive call experience, which 23% of users love. You can also use split-screen mode, which 17% of users prefer. This lets you work on other things while still seeing the FaceTime window.
Picture-in-Picture (PiP) mode on Mac makes video calls better for multitasking. It lets you watch videos or look at documents during calls. Apps like Slidepad and Elmedia Player add more to PiP, making it even more useful for work. Picture-in-Picture mode really boosts your Mac’s productivity and workflow.
Moving and Resizing the Picture-in-Picture Window
FaceTime on Mac lets you move and resize the picture-in-picture (PiP) window during calls, making multitasking on your MacBook easier and more efficient.
To move the PiP window, click and drag it to the desired location on the screen. You can place it in a corner, by the side, or near other apps.
You can also resize the PiP window by dragging its edges or corners. This lets you change its size to fit your needs without blocking your view or other tasks.
Moving and resizing the PiP window changes the game for Mac users. It lets you keep the call visible while working on other things, boosting your productivity and efficiency.
Using PiP mode in FaceTime takes your video calls on Mac to the next level. It optimizes your workflow and makes the most of your screen.
Adjusting FaceTime Call Settings
In the FaceTime app, you can change many call settings to improve video calls. For example, you can turn on Automatic Prominence, which ensures that the video of the person speaking stays the same size in group calls.
Enabling Automatic Prominence
Automatic Prominence lets FaceTime adjust video sizes to keep the speaker’s video big. This is great for group calls with lots of people.
Capturing Live Photos
You can also take Live Photos during calls. This saves special moments from your talks. Live Photos show a short animation before and after the photo, keeping the scene alive.
FaceTime also has other cool features. You can turn on Live Captions to see what’s being said in real time. You can also pick the app you want to use to start calls.
Using these settings, you can make FaceTime work just how you like it. Whether you’re talking one-on-one or in a group, you can customize your experience.
Managing FaceTime Call Participants
When using FaceTime on your MacBook, you can manage who’s on your call. You can add more people or switch to audio-only mode if you want.
Adding People to the Call
To add more people to your FaceTime call, just click the “+” button. This lets you pick contacts from your list and add them to the call. You can have up to 32 people in a Group FaceTime call at once.
Switching to Audio-Only Mode
To keep your FaceTime call going without video, switch to audio-only mode. Click the camera button to turn off the video. Your call will then use only audio, saving bandwidth or battery life.
“Manage your FaceTime call participants with ease, adding more people or switching to audio-only mode as needed.”
Whether it’s for work or just catching up, controlling who’s on your call and the call mode in FaceTime on your MacBook is super useful.
Sharing Content During FaceTime Calls
FaceTime on Mac makes it easy to share content with family and workmates during calls. You can work together on projects, show off presentations, or just have fun together. The screen sharing and SharePlay features in FaceTime help make your talks more fun and useful.
Sharing Your Screen
Sharing your screen lets you show off what you’re doing, work on documents, or teach a new skill. To do this, everyone on the call must have macOS Monterey 12.1 or later or iOS or iPadOS 15.1 or later. This makes sure everyone can share their screens smoothly, making your talks more interactive.
Using SharePlay
SharePlay is a great tool for watching movies and TV shows or listening to music together. It lets you sync up playback and controls so everyone sees and hears the same thing at the same time. It works on iOS and iPadOS devices, reaching more Apple users. To use SharePlay, you need a compatible video streaming app, and everyone must have the right to access the content.
Using FaceTime’s screen sharing and SharePlay, you can have more fun and productive calls. Whether you’re sharing ideas, working on a project, or just having fun, these features help you get the most out of your FaceTime chats.
how to do Facetime picture-in-picture on Macbook
If you use a MacBook, you can use the picture-in-picture (PiP) feature for FaceTime calls. This lets you keep the FaceTime window small while you work on other tasks.
To start PiP mode, just double-click on your own video window during a call. This makes the window detachable and movable. You can then keep talking while you do other things online or work on projects.
The PiP feature is part of many tools for video calls and multitasking on Mac. In fact, 50% of the actions for managing FaceTime calls on a MacBook involve changing the video window sizes or views.
PiP mode isn’t just for FaceTime. You can use it for watching videos, viewing local media, streaming, and even during video calls.
So, if you’re on a FaceTime call but need to keep working, use the picture-in-picture feature. It helps you multitask better and stay productive on your MacBook.
Remember, picture-in-picture mode isn’t just for FaceTime. You can use it in many media and video apps on your Mac. It’s a great way to multitask efficiently.
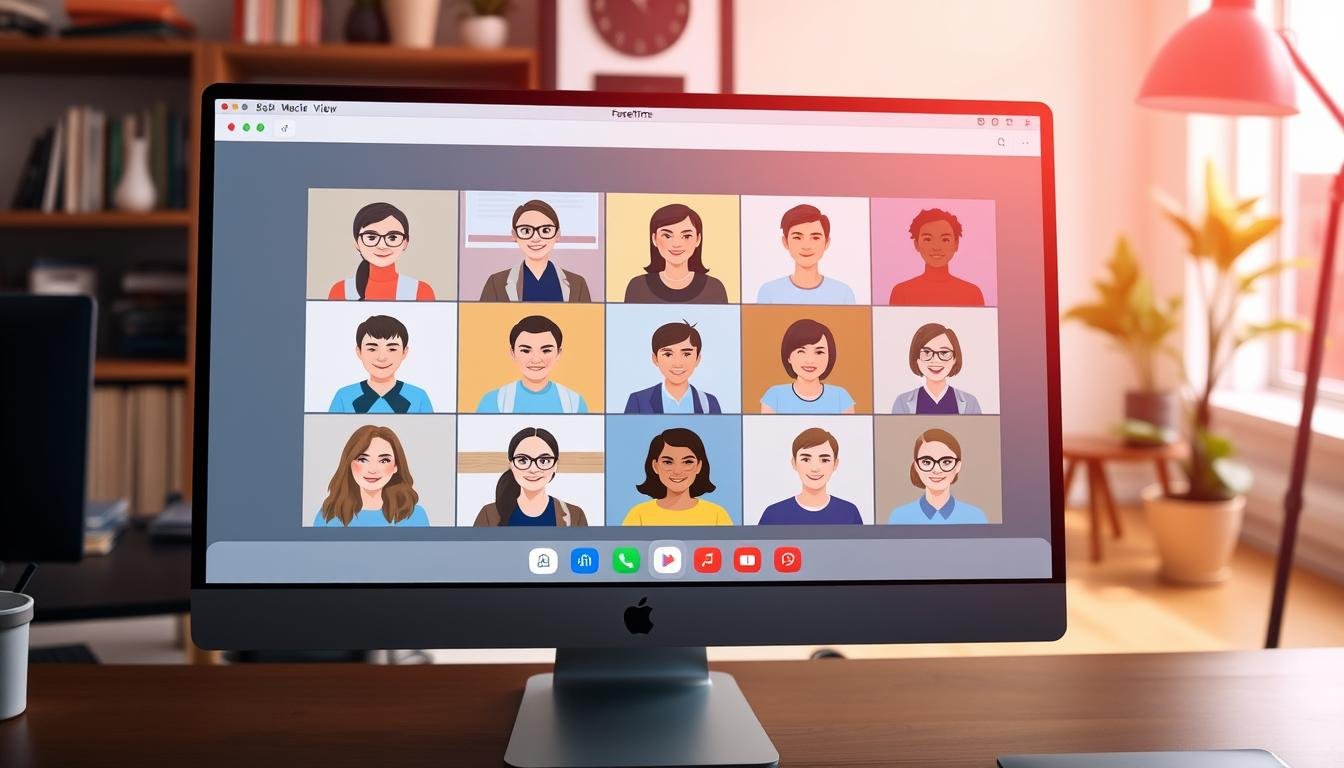
Arranging Participant Views
When you’re in a FaceTime video call with many participants, Grid View makes it easy to manage Windows. Introduced with Apple’s iOS 15 update on September 20, 2021, it shows all participants in a grid. This makes it simpler to follow the conversation and connect with everyone.
Unlocking the Power of Grid View
Grid View is great for calls with at least three other participants. It keeps you in the loop of the dialogue and lets you connect with each person. To use Grid View, just tap or click the grid icon in the FaceTime control panel.
Grid View lets you see everyone’s video feeds in a neat grid. This helps you focus on the conversation and catch nonverbal cues that might be missed. It’s perfect for remote meetings, virtual presentations, or catching up with friends or family.
Grid View in FaceTime makes video calls more structured and engaging. It ensures everyone on the call feels included and heard. This feature can make your FaceTime calls more effective.
Transferring and Extending FaceTime Calls
FaceTime on Mac is more than just a call feature. It lets you move calls between Apple devices smoothly, ensuring you can keep talking without any breaks.
Moving Calls Between Devices
Switching a FaceTime call from your Mac to your iPhone or iPad is easy. This lets you keep talking wherever you are without stopping.
Using iPad as a Second Display
Using your iPad as a second screen during a FaceTime call on your Mac is handy. It helps you work better and share information easily on a bigger screen.
| Feature | Description | Benefits |
|---|---|---|
| Moving Calls Between Devices | Seamlessly transfer FaceTime calls between Mac, iPhone, and iPad | Continuity and uninterrupted communication on the go |
| Using iPad as a Second Display | Leverage your iPad as an additional screen during FaceTime calls on Mac | Improved multitasking and productivity by referencing information on the larger tablet screen |
Apple’s Continuity makes FaceTime calls better on your Mac. It’s great for working on the move or multitasking during calls. This feature is super useful in today’s fast-paced world.
“The seamless handoff of FaceTime calls between devices is a game-changer, allowing me to stay connected no matter where I am.”
Discovering FaceTime’s full potential on your Mac can really help. It keeps you productive and helps you have better conversations.
Enhancing Video Quality
To make your FaceTime calls on your MacBook better, try different video effects and features. Use virtual backgrounds, blurring effects, or Portrait mode to look more polished and professional. This way, you can focus on yourself, not your surroundings.
Using Video Effects
FaceTime on Mac has many video effects that make your calls look great. Click the Control Center icon and choose “Video Effects” to see them. You can pick from background blurring and virtual backgrounds to customize your look.
Enabling Portrait Mode
Portrait mode can also boost your video quality. It blurs the background, keeping you in focus. To turn it on, click the Control Center icon, then “Video Effects,” and pick “Portrait”.
Using these tools can make your FaceTime calls look better. Whether using a MacBook Air 13″ or any other Mac, these features help you look your best during video chats.
If your Mac’s camera isn’t working properly, contact Apple Support for help. For better quality, you can also use your iPhone as a webcam.
“Elevate your video call experience with FaceTime’s powerful visual enhancement tools on your Mac.”
Controlling Camera Settings
Using your iPhone as a webcam for FaceTime on your Mac lets you tweak camera settings. You can adjust zoom, pan, and recenter the frame. You can also turn on the Studio Light feature. These options help you look your best during calls.
Adjusting Zoom, Pan, and Recentering
Adjusting zoom, panning left or right, and recentering lets you draw attention to certain areas. It’s great for showing details or framing shots for the best look. These controls make your video calls more engaging.
Enabling Studio Light
The Studio Light feature in FaceTime makes your video calls look better. It dims the background and lights up your face. This makes you look more polished and professional. Say goodbye to bad shadows and hello to well-lit facial features, no matter where you are.
These camera settings let you control how you look on FaceTime. They improve your experience and that of your callers. Mastering these features boosts your confidence, whether for work, fun, or sharing special moments.
Utilizing Desk View
With the latest macOS updates, you can now use your iPhone as a webcam for FaceTime video calls. The Desk View feature lets you show what’s on your desk while you’re on the call. This gives your video conference friends a better look at your workspace.
To use Desk View, place your iPhone’s rear camera over your desk. Adjust the zoom to get the right shot. It’s like having an overhead camera, letting you share your desk and any important papers with others.
Desk View is great for remote or hybrid work. It lets you bring your physical space into virtual meetings, making them better for everyone.
Whether you’re showing a presentation or working on a project, Desk View makes video calls more engaging. It shows Apple’s dedication to making the Mac better for work and collaboration.
“Desk View is a game-changer for remote work and video conferencing. It allows me to seamlessly share my workspace and materials with my team, making our virtual meetings much more interactive and productive.”
To get the most out of Desk View, make sure your Mac and iPhone or iPad are up to date. With a few easy steps, you can make your video calls better and work more efficiently on your Mac.
Conclusion
The FaceTime app on Mac has many features that make video calls better. You can use picture-in-picture mode to multitask while watching videos. This boosts your productivity.
You can also adjust camera settings and use advanced features like Desk View. These help you work more efficiently during FaceTime calls.
Exploring features like moving the Picture-in-picture overlay anywhere on the screen is key. This lets you fully enjoy the FaceTime experience on your Mac. It also makes your video conferencing workflow better.
With only a few apps on the Mac App Store for pictures, Setapp offers over 200 productivity apps. These include Luminar, TouchRetouch, Capto, and CleanShot X. They can enhance your video calling and productivity on your MacBook.
Using how to do Facetime pictures in pictures on a Macbook or the video calling features of FaceTime can be very helpful. The Apple Facetime guide can unlock your Mac’s full potential. This way, you can leverage Mac capabilities and enhance your video conferencing experience.
FAQ
How can I use picture-in-picture mode for FaceTime on my MacBook?
To use picture-in-picture mode for FaceTime on your MacBook, just double-click on your video window during a call. This opens your video in a separate window. You can then move this window around the screen. This lets you keep working on other tasks while still talking on FaceTime.
How do I access FaceTime on my Mac?
To get to FaceTime on your Mac, open the FaceTime app and start a call. The FaceTime app comes with macOS. You can find it in the Launchpad or by searching in Spotlight.
How can I customize the FaceTime window on my Mac?
During a FaceTime call, you can keep the window on top of other apps. You can also view it on a full screen or split screen. And, you can move the picture-in-picture window anywhere in the larger window.
Can I adjust the settings for a FaceTime call on my Mac?
Yes, in the FaceTime app, you can change all settings to improve your experience. You can turn on Automatic Prominence and capture Live Photos during calls.
How can I manage the participants in a FaceTime call on my Mac?
During a FaceTime call, you can add more people or switch to audio-only mode. To add more, invite them to join. To switch to audio-only, click the camera button to turn off your video.
Can I share content on my Mac during a FaceTime call?
Yes, FaceTime on Mac lets you share content like your screen or use SharePlay. Sharing your screen helps you collaborate or present information. SharePlay lets you watch videos or listen to audio together with others.
How can I arrange the participant views during a group FaceTime call on my Mac?
In a group FaceTime call, use Grid View to see everyone in a grid layout. This makes it easier to follow the conversation and talk to everyone.
Can I transfer or extend a FaceTime call on my Mac?
Yes, FaceTime on Mac lets you transfer and extend calls. You can move a call to another device like your iPhone or iPad. You can also use your iPad as a second display during a call, helping you multitask.
How can I enhance the video quality and visual appeal of my FaceTime calls on Mac?
To improve your FaceTime calls, use video effects and features. You can apply background blurring or virtual backgrounds. You can also enable Portrait mode and adjust camera settings like zoom and pan.
What is the Desk View feature for FaceTime on Mac?
With macOS 13 or later, Desk View lets you show your desk when using your iPhone as a webcam for FaceTime. It gives a better view of your work setup during calls.
Source Links
- Change your view of a FaceTime call on Mac – https://support.apple.com/guide/facetime/change-your-view-of-a-call-fctm35523/mac
- How to Use Picture in Picture Mode During FaceTime on iPhone and iPad – https://wccftech.com/how-to/facetime-video-picture-in-picture-iphone-ipad/
- The best ways to use picture-in-picture on Mac – https://setapp.com/how-to/use-picture-in-picture-on-mac
- Move and arrange app windows on Mac – https://support.apple.com/my-mm/guide/mac-help/mchlp2469/mac
- How to enable and disable picture-in-picture in Safari for Mac_iPhone_iPad – https://filmora.wondershare.com/more-tips/enable-and-disable-picture-in-picture-in-safari.html
